High quality live streaming of your events on a shoestring
The past year our usergroup has been experimenting with streaming events and creating videos afterwards. In this article you find the setup that we found working the best for us. We looked at setup time, portability of set, quality of stream and the costs. The setup we landed on consists of 3 parts that you can buy for around 500 dollars.
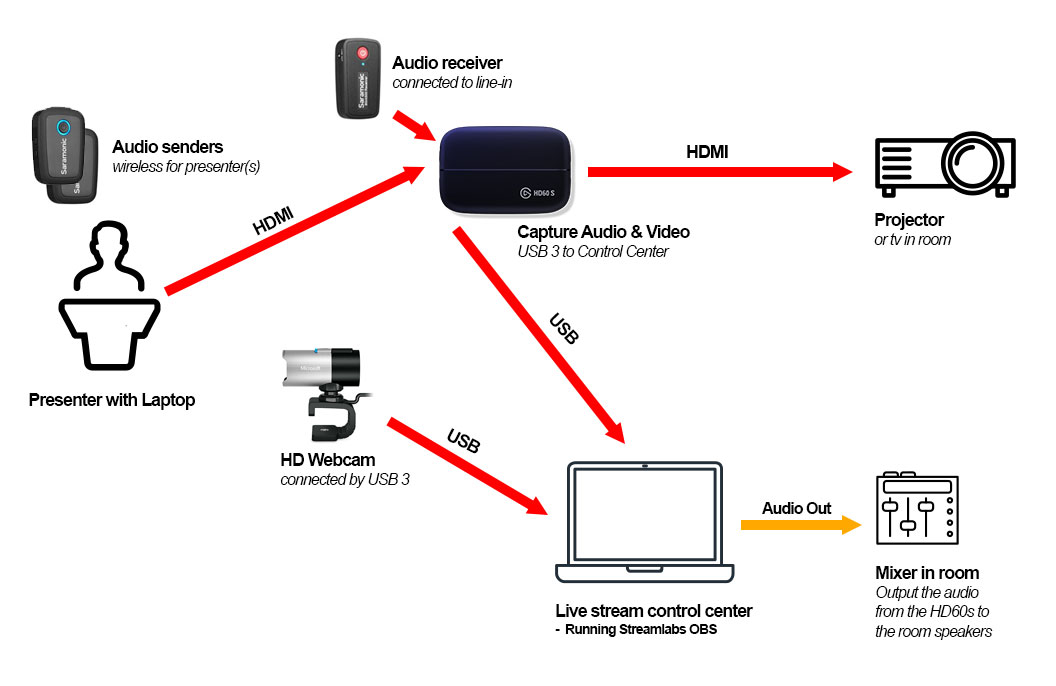
To setup a live stream you need to capture 3 input streams, combine them using a computer (control center) running broadcast software (Streamlabs OBS) to stream it to a online plaform (YouTube).

The 3 input streams
- Computer screen from the presenter (Slides & Demos), for this we use an Elgate Capture HD60s.
- Audio from the presenter(s), for this we use Saramonic blink500 wireless microphones.
- Video of the stage/presenter(s), for this we use a HD Webcam.
Our setup
This is how the setup looks like when everything is connected.

Let's zoom into the specific parts that we need to capture.
Screen from the presenter
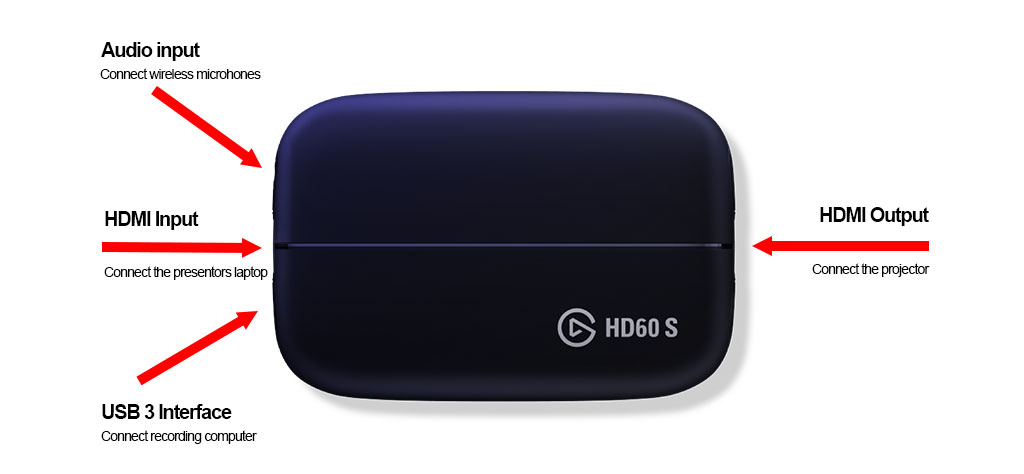
To capture the screen from the presenter you need to add a device that will capture the output (HDMI) from the laptop. The easiest way is to use a 'game capture' device like the Elgate Capture HD60s.
Setup
The device has a HDMI input port and HDMI output port. The only thing you have to do is to put this device between the laptop and the projector and connect the USB-3 cable to the control center (the computer that is going to publish the stream).

References
Audio from the presenter(s)
When streaming a session the audio is an essential thing, you can of-course use the microphone from your laptop or the camera, but the chance is very big that your audio is going to be very low in quality.
After a long search and trying out a few options we landend on the Saramonic blink500 wireless microphones, this is why:
- Extremely portable. (They are very small)
- Using 2.4GHz Channel. This frequency is allowed everywhere!
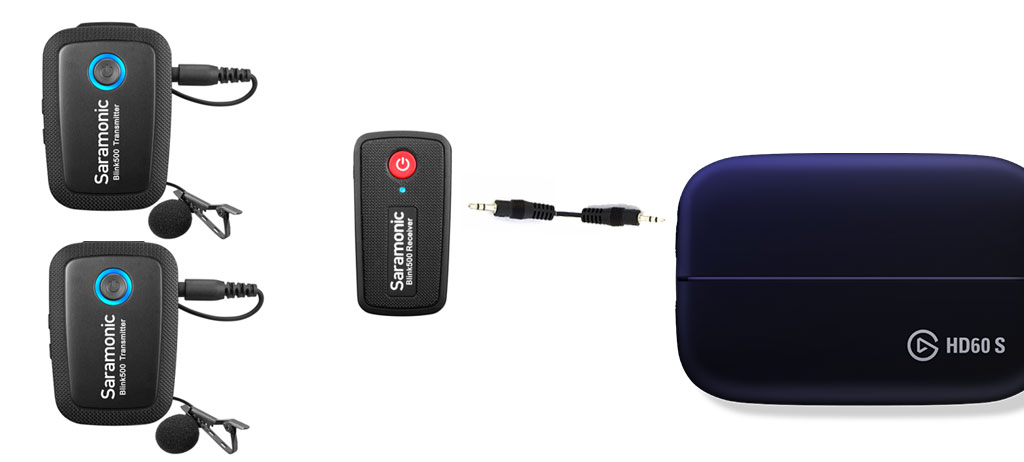
- You can use in the build-in microphone in the sender (Just clip-on and go) or connect a lavelier microphone to the receiver for better quality.
- No mixer needed, just connect to a line-in (mini-jack)
- It comes with 2 senders and 1 receiver. This is perfect if you have 2 presenters.
Setup
Connect the line-out from the receiver to the line-in from the Elgato HD60s, connecting the mic to the HD60 will keep your line-in/out connection on your laptop free to output the captured audio.

References
Video of the stage
Not a requirement, but it is nice to add a video stream from the presenter telling the story. This can be done with any webcam. We use a Microsoft HD Lifecam Studio with an USB 3 extention cable.
References
The control center
On the control all the streams come together. We use Streamlabs OBS to combine the streams in a nice template and stream the output to YouTube.
References
Total costs
| Item | Costs | Amazon.com | Netherlands |
|---|---|---|---|
| Elgate Capture HD60s | From 180$ | Buy on Amazon | Buy on Coolblue |
| Saramonic Blink 500 | From 240$ | Buy on Amazon | Buy on Bol.com |
| Microsoft HD Lifecam Studio | 60$ | Buy on Amazon | Buy on Bol.com |
Thanks for reading and I hope it is helpful. If you have any comments or add-ons to this article? Feel free to submit your comments or do a pull-request on GitHub.